Intramaps - Intramaps Setup
Create a Project and Module for myData
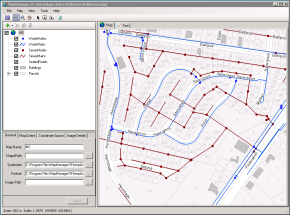
Create a map containing your asset layers using IntraMaps MapManager and save it as a .map file.
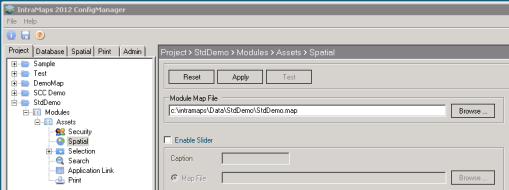
Once finalized, create a new Project and Module in the IntraMaps ConfigManager.
Under your Module, select the Spatial option and hit the Browse… button next to Module Map File.
Navigate to your asset map before hitting Apply and saving your changes.
Create Selection Layers in IntraMaps
You must configure each of the asset layers you want to link in myData as Selection Layers in IntraMaps.
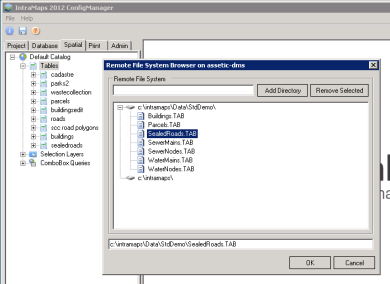
To do this, activate the Spatial tab and right-click on Tables.
Select the type of table that corresponds to your asset layer and navigate to it using the dialogue box (or enter the DB connection details if adding a table from SQL Server):
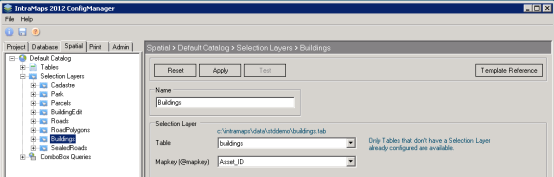
Accept all defaults and add the table as a new selection layer below (right-click on Selection Layers and hit New Selection layer).
Add a name for your selection layer, select the corresponding table from the drop-down menu, then select the table field that stores the Asset ID as the Mapkey (@mapkey).
Click 'Apply', do this for each of the asset layers you want to link to myData.
Configuring IntraMaps to myData Client Integration
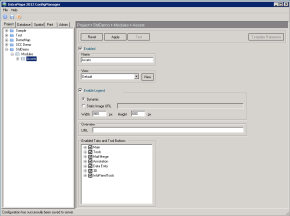
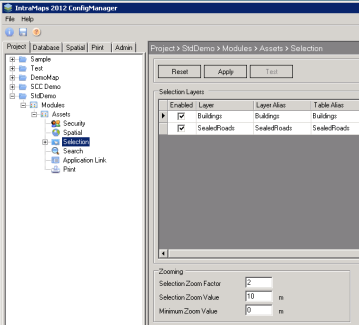
Go back to the Project tab and click on the Selection option under your Module.
Enable the layers you want to link to myData by placing a tick in the corresponding checkbox.
Add zooming information (the settings in the image below work well, but these can be adjusted according to your requirements). Now click 'Apply':
Expand the Selection option to view your selection layers in the tree.
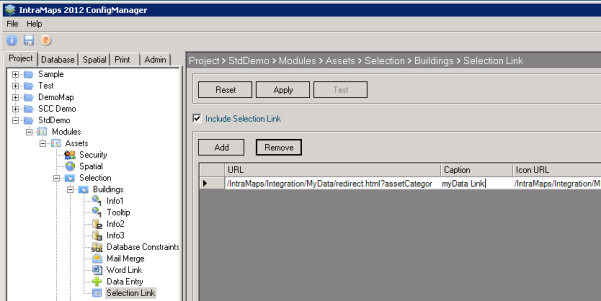
Expand the layer you want to link to myData and go to Selection Link.
Place a tick in the Include Selection Link checkbox and hit Add.
A new row is created where you can enter the following information before clicking 'Apply':
- URL: /IntraMaps/Integration/MyData/redirect.html?assetCategory=Buildings (replace 'Buildings' with the applicable database name for your asset category. These names need to be supplied by Assetic)
- Caption: myData Link
- Icon URL: /IntraMaps/Integration/MyData/MDP_icon.png
Once the client integration is configured, a myData icon will appear in the toolbar of IntraMaps when the selection layer is active and a selection is made.
There is a 1:1 relationship between IntraMaps selection layer and Asset Category, so to integrate with more than one Asset Category, additional selection links need to be configured.
